I love it when things work out. Picked the tyres up Wednesday after work, wheels got delivered in the evening. Dropped them off at a garage Thursday on the way to work, picked them up on the way home, then headed to the 280Z.
Firstly, a shot of the car now that it's had time to settle on the springs:
So let's do this! Firstly, wheel off...
See all that crud lying on the ground? That was soil and dirt that was inside the previous shock boot. I didn't want that happening again - something that was left over from fitting the lowering springs and struts was clamping down the dust boots:
Yeah, I used hose clamps. I'd like to get proper CV-boot clamps on them eventually, but this is what I had lying around and it'll do for now.
New vs old:
And fitted:
Pretty happy with that.
One more thing - I had a Joyfast gear knob in my old MX5. You won't believe how much different a heavy chunk of metal can make to the gearshift feel on a car. Well, Joyfast don't make a M8x1.25 or whatever the thread is of the 280Z, so I grabbed a helicoil set and used that to step down from the M10x1.5 thread on the Joyfast knob.
Thursday, April 20, 2017
Wednesday, April 19, 2017
Saturday, April 15, 2017
Suspension Part 3
This was across two separate sessions. Everything arrived (although I was sent the wrong rear struts - quickly rectified).
So, open a box:
Rear spring comparison:
Front spring comparison
Rebuilding the shocks was very straight forward. Simply slide the new gas cartridge in, fill with oil and tighten up:
And before you know it, you have two nice looking units to put back on the car:
No photos of the reassembly of the fronts or putting everything back on the car - I needed both my hands!
And the end result:
Very happy.
At some point when I was out buying something from Harbor Freight, I spotted this cool looking Chrysler in the car park:
Monday, April 10, 2017
Suspension Part 2
Grabbed another hour today, so I thought I'd finish off stripping down the struts.
The complete unit, ready for battle:
Attach some of my least favourite tools; the spring compressors. Tighten until you can rotate the top mount easily - that means the springs won't come flying off when you remove the top mount:
Remove the topmounts - very straightforward, just one nut holds them to the top of the strut:
Then the springs can come off, and you get the joy of taking the spring compressors off. Which takes ages when you're using hand tools:
Huzzah! Getting somewhere now. Lets a look what's left - the top of the strut with a big (2" or so) hex nut:
I had to buy a special tool for this:
That came off nice and easy for both shocks, which is great as I thought it was going to be a total pain.
Liberate the cartridges:
Oh - something appears to be amiss. The passenger side cartridge seems to be completely devoid of fluid. So probably a good job I'm replacing them!
And done! All ready the new inserts and springs tomorrow.
Sunday, April 9, 2017
Suspension Part 1
I was never that happy with the height of the 280Z, especially the rear end. I'm still waiting for more parts to arrive (bumpers, seat covers, steering wheel etc), so I thought I may as well use the opportunity to swap the suspension.
I ordered some replacement shocks and lowering springs that should bring it down about 1". After doing some reading online, it looked like the rears were going to be the most problematic. I had a full day to tackle them, so time to get cracking!
Firstly a huge acknowledgement - http://atlanticz.ca/zclub/techtips/suspension/rearstruts/index.html is probably the most thorough guide I found online that documents removing the strut / hub unit without having to remove the transverse link spindle pin. I initially started down that path, then really didn't fancy trying to pull a foot long bolt out.
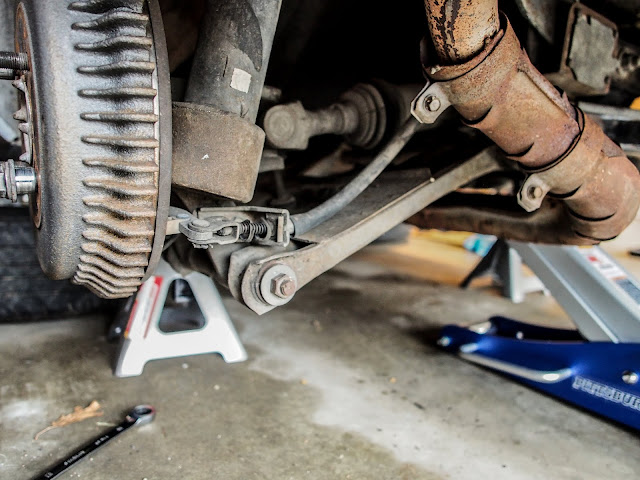
So, wheels off:
And done!
Ahhhh, if only it was that simple. I ended up removing a fair amount of stuff; the ARB topmount, handbrake connector, both control arm bush mounts, the half shaft....
Overall the job wasn't too bad. All the bolts were tight, but came off with some persuasion with a breaker bar. Nothing rounded, nothing sheared. It was exactly the opposite of working on my old MX5.
And the two struts removed:
I ordered some replacement shocks and lowering springs that should bring it down about 1". After doing some reading online, it looked like the rears were going to be the most problematic. I had a full day to tackle them, so time to get cracking!
Firstly a huge acknowledgement - http://atlanticz.ca/zclub/techtips/suspension/rearstruts/index.html is probably the most thorough guide I found online that documents removing the strut / hub unit without having to remove the transverse link spindle pin. I initially started down that path, then really didn't fancy trying to pull a foot long bolt out.
So, wheels off:
And done!
Ahhhh, if only it was that simple. I ended up removing a fair amount of stuff; the ARB topmount, handbrake connector, both control arm bush mounts, the half shaft....
And the two struts removed:
The new gas struts and springs arrive on Tuesday, so I'll hopefully get them all fitted this week.
Wednesday, April 5, 2017
Vancouver and Fuel
Progress on the 280Z has been a little slow over the last couple of weeks, as I was away with work in Vancouver. Nothing much to say, we got an inch of rain every day but one, when I got out to take some pictures and trek seven miles all over.
All in all, it's a fun city. Had a lot of fun walking around.
Onto the car. I changed all the locks over, so now I can actually lock all the doors with the same key. No pictures of that, because... well, it was pretty boring. If you look at the picture below, you can see a lock that I replaced. Or just look at how nice the car is.
The fuel pump was making a horrible noise, so I'd ordered a replacement. Full of excitement, I went over there, got the car up on ramps and starting looking at what was required. Sadly all the rubber fuel lines were hard, and I really didn't want to pull them all off, let them split etc. Begrudgingly I busied myself by changing the fuel filter in the engine, and replaced the fuel hose there as well as one was weeping a little:
I've got some proper sized clamps on my shelf to fit when I'm next there.
At the top of this shot below, above the brake cylinders, you might notice a gap. Well, it turns out that the washer bottle is meant to fill that gap, which would explain why the washer button does nothing.
I had a root through the spares boxes and result! A washer bottle and pump. The nozzles are still on the car, so it looks like I was in business. Unfortunately the piping was so old it had gone completely solid, and when trying to remove it, I snapped one of the nipples off the base of the bottle, so now I'm waiting for a brass replacement to arrive.
Subscribe to:
Posts (Atom)